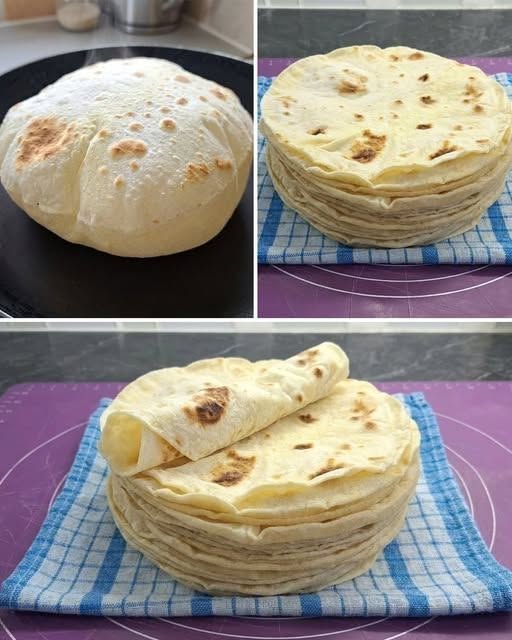
Soft, flexible, and easy to make, these homemade gluten-free tortillas are perfect for wraps, tacos, quesadillas, breakfast rolls, and more.
Ingredients
- 2 cups gluten-free all-purpose flour blend
- ½ teaspoon salt
- 1 teaspoon baking powder
- 1 teaspoon xanthan gum, if your flour blend does not already contain it
- 2 tablespoons olive oil or neutral cooking oil
- ¾ cup warm water, added as needed
- Extra gluten-free flour for rolling
Important: If you have celiac disease or follow a strict gluten-free diet, check the packaging of your flour and all other ingredients for gluten-free labeling. Also take care to prevent cross-contact with gluten-containing foods, utensils, and surfaces.
Step 1: Mix the Dry Ingredients
In a large mixing bowl, combine the gluten-free flour, salt, baking powder, and xanthan gum.
Whisk or stir well until everything is evenly combined.
Xanthan gum helps bind the dough and can help prevent the tortillas from cracking or falling apart.
If your gluten-free flour blend already contains xanthan gum or another binder, you may not need to add extra. Check the instructions on your flour blend.
Step 2: Add the Oil
Add the olive oil to the dry ingredients.
Mix with a spoon or your fingertips until the oil is evenly distributed throughout the flour.
The oil helps give the tortillas a softer, more pliable texture. You can use a neutral cooking oil instead of olive oil if preferred.
Step 3: Add the Warm Water
Gradually add the warm water while mixing with a spoon or spatula.
Don’t add all the water at once. Different gluten-free flour blends absorb different amounts of liquid, so you may need slightly more or less water.
The dough should be soft and easy to shape but not excessively sticky.
- If the dough feels dry or crumbly, add water 1 tablespoon at a time.
- If it becomes too sticky, add a small amount of gluten-free flour.
Step 4: Let the Dough Rest
Cover the bowl with a clean kitchen towel or plastic wrap.
Let the dough rest for approximately 15–20 minutes.
This allows the flour to absorb the moisture and makes the dough easier to handle.
Step 5: Divide the Dough
After resting, divide the dough into 6–8 equal portions, depending on how large you want your tortillas.
Gently shape each portion into a smooth ball.
Gluten-free dough is not as stretchy as traditional wheat dough, so handle it gently and avoid excessive kneading.
Step 6: Roll the Tortillas
Place one dough ball between two sheets of parchment paper.
Using a rolling pin, gently roll the dough into a thin, round tortilla.
Parchment paper is especially helpful because gluten-free dough can stick or tear more easily than traditional dough.
If the edges crack, gently press them together with your fingers to smooth them out.
Step 7: Heat the Pan
Preheat a nonstick skillet or flat pan over medium heat.
You generally don’t need to add oil. If your pan tends to stick, lightly coat it with a small amount of oil.
Once the pan is hot, carefully transfer the tortilla to the pan.
Step 8: Cook the Tortilla
Cook for approximately 30–60 seconds, or until small bubbles and light brown spots begin to appear.
Flip the tortilla and cook the other side for another 30–60 seconds.
Avoid overcooking, as gluten-free tortillas can become dry and brittle.
Once cooked, immediately place the tortilla inside a clean kitchen towel and cover it.
Step 9: Cook the Remaining Tortillas
Repeat the rolling and cooking process with the remaining dough balls.
Stack the cooked tortillas inside the towel as you go. Keeping them covered helps retain moisture and keeps them soft and flexible.
Tips for Soft Gluten-Free Tortillas
- Add water gradually: Every gluten-free flour blend absorbs liquid differently, so add water slowly.
- Let the dough rest: Resting gives the flour time to absorb moisture and makes the dough easier to work with.
- Use parchment paper: It makes rolling easier and reduces sticking and tearing.
- Don’t overcook: Too much time on the pan can make gluten-free tortillas dry and brittle.
- Keep cooked tortillas covered: A clean towel or covered container helps keep them soft and flexible.
How to Serve Gluten-Free Tortillas
These homemade tortillas are incredibly versatile.
- Breakfast: Fill with scrambled eggs and vegetables.
- Lunch: Make a wrap with grilled chicken, lettuce, and fresh vegetables.
- Tacos: Fill with seasoned chicken, beef, beans, salsa, and your favorite toppings.
- Quesadillas: Add cheese and vegetables, then cook until golden and melted.
- Snack: Lightly toast the tortillas, cut them into strips, and serve with your favorite dip.
Storage
Allow the tortillas to cool completely before storing them in an airtight container or zip-top bag.
For short-term storage, keep them in a clean, airtight container at room temperature.
For longer storage, refrigerate or freeze them.
If freezing, place parchment paper between the tortillas so you can easily separate them when needed.
Final Result
Your homemade gluten-free flour tortillas are ready! 🌯
They’re soft, flexible, and delicious—and perfect for chicken wraps, tacos, breakfast rolls, quesadillas, burritos, and more.
One of the best things about making tortillas at home is that you can control the ingredients and adjust them to suit your preferences.
Recipe Tip: If you follow a strict gluten-free diet, make sure your rolling surface, pan, utensils, and storage containers are also protected from gluten cross-contact.

